

Stacy’s Tip of the Week 8.12.16 ShoreTel: IM Presence
Readers,
Meet Stacy! She’s a talented employee but struggles immensely when it comes to technology. She asked our technicians countless questions a week. She annoyed the techs so much they now call her “Stumped Stacy”. The techs finally had to tell Stacy that she was limited to one question a week about her ShoreTel IP phone as long as she promised to share what she learned on our company blog to educate customers.
Stumped Stacy to Tim the Tech:
Dear Tim the Tech, on my Communicator I can see if my coworkers are on calls but I can not see if they are available for IMs. All the other employees have two presence bubbles and can see when others are available for calls and IMs. Why can’t I see when users are available for IMs? Did everyone block me on the ShoreTel Instant Messaging application?
Tim the Tech:
Dear Stumped Stacy, no, the other employees did not block you. (They would be smart if they did though). You do not have the separate telephony and IM presence bubble setting turned on in your Communicator. With your ShoreTel Communicator you can clearly differentiate between the phone presence and the IM presence by having two separate bubbles instead of just one. With two separate bubbles you do not need to guess the availability of your colleagues. In the image below, there are two presence bubbles shown. This week I will teach you how to add a second presence bubble for IM.
ShoreTel Communicator for Windows:
Show your Phone and IM Presence in Two Separate Bubbles
Note: You will not be able to have a IM presence bubble if your ShoreTel Administrator has not assigned your user to an IM Server.

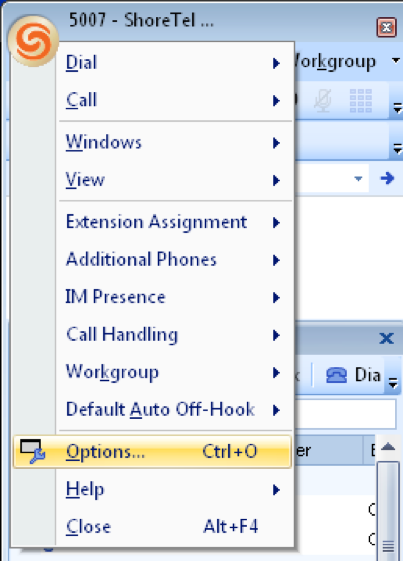
To add a second bubble click on the ShoreTel icon and select ‘Options’.
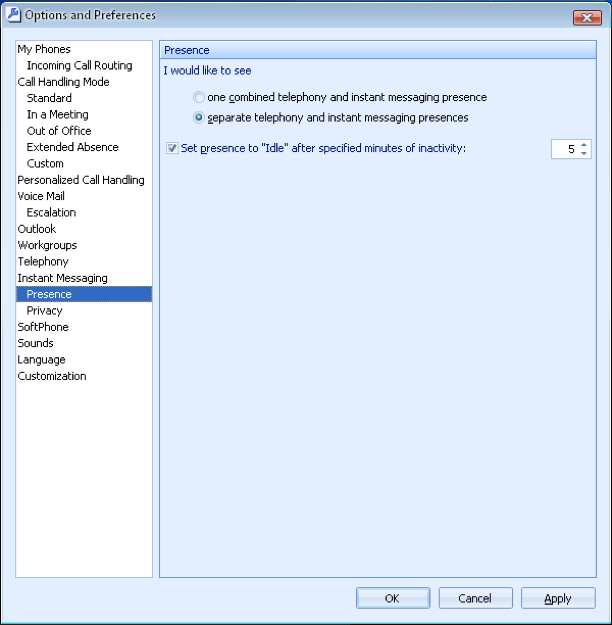
Next in the ‘Options and Preferences’ window, select ‘Presence’ from the left column. Then on the right select the bubble that reads ‘separate telephony and instant messaging presences’. At the bottom of the window, select ‘OK’.
Two separate presence bubbles are now displayed in your ShoreTel Communicator. The first bubble indicates phone presence, the second indicates IM presence.

For the first bubble (phone presence) green indicates the user is available and the call handling mode ‘Standard’ has been selected. If the bubble is red, the user has changed their call handling mode to a do not disturb mode. See the image below for the different call handling modes.

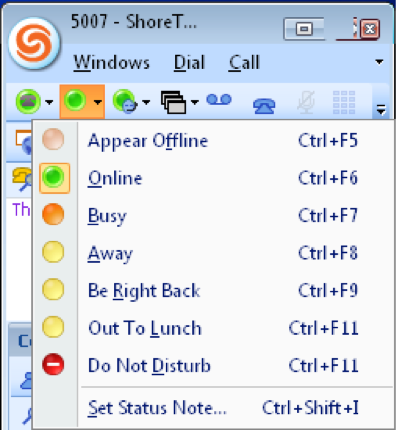
For the second bubble (IM) green indicates available. Your IM bubble will be displayed as green if you choose the option ‘Online’. The image below shows the other IM availability options and the bubble colors that are associated.
WOW! That was Simple! Thank you for reading Stacy’s Tip of the Week! Have a Great Weekend!
You can save and download this Tip of the Week by clicking here:
Stacy’s Tip of the Week! Welcome to ShoreTel Connect!